Firmware update and initial setup
I updated to the recommended firmware, the latest version available on the official Analogue website, 1.19. You copy it to the root of the included SD card and, when you power on the console, it automatically boots into firmware upgrade mode.
The firmware file was about 37 MB, and the upgrade process took roughly 4–5 minutes. When the process finishes, the console restarts on its own.
If there’s already an older firmware on the SD card, you just need to replace it with the new one and restart the console. After the new firmware is installed, it can either stay on the card or be deleted; even if it remains on the card, the console will no longer enter firmware flash mode again.


On startup, the console greets you with a sleek dark-background image showing a TV stand, with a TV on it and the console standing out in white against the dark background. The startup screen also provides instructions on how to position the console so it has enough space for cooling. It uses active cooling, which can be heard at times.
There’s also an EULA that needs to be accepted during the setup and first boot of the console.
On first boot it’s a bit odd that, even though I had updated to the latest available version, I still got a message telling me to update to the latest version of the 3D OS operating system.
Button combinations and the main menu
The next setup screen shows you the button combinations, both for the official controller and for the original Nintendo 64 controller. These button shortcuts are for:
- opening the console’s dedicated menu while a game is running
- changing the display mode
- selecting Rumble and Controller Pak
Once you reach the main menu, you have two main views:
- one for your games
- one for the console settings


Game view
This view displays the games you’ve played in a carousel. Even though the console only works with original Nintendo 64 cartridges, it has a menu mode where it remembers the cartridges that have been inserted and saves them in a carousel-style list. In this list it can show artwork (which you have to place manually on the SD card; it doesn’t pull it automatically from the cartridge), as well as some information extracted for each game, such as:
- how many players the game supports
- which accessories are compatible
- the region where the game was published (for Analogue 3D this doesn’t matter, since games from all regions are compatible)
- who developed the game
- its release date
- the date when the game was first added
- the total time the game has been played
The difference in how information is displayed for each game, depending on whether the cartridge is inserted or not, is that the option to play the game is greyed out when the cartridge is not present in the console.


I have to admit that this carousel-style display for cartridges that have been inserted into the console is very similar to the menu on the Nintendo Switch. They clearly had a good source of inspiration. On the Switch, indeed, all the extra text information is missing.
Inserting a cartridge and game-specific settings
When inserting a game cartridge — in my case Super Mario 64 — the text information in the view was populated, but without the artwork, which was to be expected.
At the same time, a new dedicated game configuration menu was enabled. If you change these settings, they apply only to the game currently in the console, not globally to all cartridges.
Game settings:


I mentioned in the unboxing article that the box also includes a cartridge cleaning tool. I had to use it because my cartridge refused to boot. I guess they knew what they were doing when they added it to the retail package. After cleaning the cartridge with that tool, which is basically a kind of rubberized sponge, the game started working as if by magic.
In the game configuration section, under “display mode” we have several display modes: BVM, PVM, CRT, Scanlines, Clean, each with its own settings.
The upgrade to firmware version 1.19 of the 3D OS operating system didn’t bring changes to the general configuration section, only to the per-game configuration options.
Configuring each game individually offers a very high level of granularity, but it can also be a downside if you have a large game library that you want to customize. Fortunately, I don’t think this will be necessary; most games will run just fine with the default settings.
How to add artwork for games in the main menu
The 3D OS console operating system menu is quite basic at the moment, with very few options for customizing the display. The overall menu theme is rather sober, dark-style, with black and white colors in a retro look. The same goes for the game view, where the only extra information is what’s read automatically and populated when you insert a cartridge.
Still, following the model of retro game emulators, there is an artwork mode that can display images for each game. Unfortunately, this artwork generation process is not automated, so we have to manually populate the images for each of our games. We can do this on the SD card that comes with the console.
For each inserted game, on the SD card in the Library folder, under the N64 subfolder (it’s curious why they used a subfolder named after the console when N64 games are the only ones supported; maybe this is a sign that in the future we can expect support to expand to games from other consoles, or it might just be a leftover from the development process where they reused code from other internal projects), a Games folder is created, with subfolders named after each game plus an auto-generated string, probably for uniqueness. These folders store the customized settings for each game as a .json file.
Besides this Games folder, there’s a second folder called Images. This is where you need to save the artwork images for each game.
The community has already put together a complete database:
All we have to do is copy the file into the Images folder on the SD card and, normally, we’ll see these images in the game menu.


After copying the file, the menu becomes a bit more colorful. This database won’t need frequent updates, since the original N64 game library is finite. Updates will only be needed for any new game releases (3rd party, indie) or if support for other consoles is added.
Controller and connectivity
The dedicated 8BitDo 64 controller pairs automatically when the pairing buttons on both the console and the controller are pressed. The button on the console is the same as the front status LED. At first glance it looks like just a status LED, but it’s also a button; if you hold it down, the console starts searching for available controllers.
When a controller is connected via Bluetooth, the status LED next to the physical controller port also lights up, so you can always see how many controllers are connected to the console.
A small inconvenience appears when you have both a wired controller and a Bluetooth controller connected, and the wired controller is in the first console port (which, just like on the original Nintendo 64, is the one that controls the menu). If you unplug the wired controller from the first port, the Bluetooth controller doesn’t automatically switch to being the main controller, and you lose control in the 3D OS menu. I had to restart the pairing process to reconnect it as the primary controller.
Gameplay experience on Analogue 3D
When you insert a cartridge for a game that has already been played on the Analogue 3D, the console jumps directly to that game in the carousel, so you don’t have to scroll to find it. It’s a small functional detail, but effective and very useful, especially when you have a large game library.
There’s a dedicated in-game menu that lets you exit the game whenever you want to switch to another one, so you no longer have to reset the console every time.


The best experience I had was using the Clean display mode, where I got the most optimal view in terms of both image quality and size, without any noticeable loss of quality.
All the game cartridges I tested — not many, just five that I own — ran smoothly, with no stuttering or issues. Throughout my time with the console, the image quality was excellent, with substantial improvements compared to an original Nintendo 64 console.
Out of the five cartridges tested, only one was among the most iconic games on the Nintendo 64, namely Super Mario 64, the game that laid the foundations for 3D gaming; the others were Magical Tetris Challenge, The New Tetris (yes, I like Tetris games, and this one is even more special because it supports 4-player family play), FIFA 99 (yes, the one from EA Games) and International Superstar Soccer 64. From the image settings, a user can choose whether they want the image to be as close as possible to the original, retro-style, or a smoother image closer to what we’re used to today.


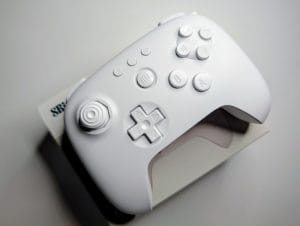
Comparing the gameplay experience with an original controller versus the dedicated 8BitDo 64 controller, if I were to use an analogy, it’s exactly the difference between using something analog and something modern from today. The joystick on the original controller has a longer travel, it’s taller and, being analog, it has that feeling where you can sense physical gears when you use it. The 8BitDo one, being digital with Hall effect, has a shorter travel.
It’s like what we say about a car clutch, that it “bites higher or lower”. To continue the analogy: it’s like driving a modern car versus an old but well-maintained one. My original Nintendo 64 controllers are in excellent condition, even though they’re over 20 years old.
Subjectively, and being used to modern controllers now, I’d say the 8BitDo 64 feels more comfortable in my hands. You can read the full review of the new 8BitDo 64 controller in the dedicated article. But both offer an excellent experience, and I think it ultimately comes down to personal preference.
During gaming sessions, the Analogue 3D console warmed up moderately, with the case only slightly warm to the touch. This is also thanks to the active cooling, an internal fan that you can sometimes hear if the room is quiet.
Unfortunately, I didn’t have a Nintendo 64 flashcart available to test with the console. Online there have been various reports that some work and others don’t. I think that’s somewhat to be expected at the beginning; in the future, after a few more firmware iterations, I believe most of these issues will be ironed out.
Conclusions
The console is of superior quality, both in terms of design — detailed in the unboxing article — and in terms of software and functionality. Games run excellently, and 100% compatibility with all N64 games ever released practically gives a second life to the entire cartridge library.
The four controller ports bring back the original home local multiplayer, and probably the most iconic version of it. Even though today “multiplayer” is synonymous with online gaming, I think the kind of multiplayer where everyone sits together on the couch in front of the TV has a special place.
⚠️ Conținut generat automat cu OpenAI gpt-4o