Why install Linux on Android
I’ve noticed that even if we have a well-polished desktop system on mobile, when it comes to apps we’re limited to Android apps. With all their downsides.
If we already have a desktop in our pocket, why not have desktop apps as well? We can create graphics with GIMP, edit office documents with LibreOffice, or code in VSCode. Or maybe you’re simply a Linux enthusiast.
And until we all have native Linux with GPU acceleration support, we have to install a Linux distribution ourselves.
What we need for Linux on Android
There are countless ways to install a Linux distribution on Android. I chose the Termux + Andronix combo. It seems the simplest and most hassle-free to me. It costs a bit (for me it was under 3,6 euros), but it’s absolutely worth the money.
To begin with, we’ll install F-Droid. That’s because we need Termux installed from F-Droid, not the one from Google Play (as we’re informed here).
After installing F-Droid, we’ll install Termux. What is Termux? Termux is an Android terminal emulator and a Linux environment app that works straight away, without requiring root access or various other configurations. A minimal base system is installed automatically, and additional packages are available using the package manager.
After installing Termux, we’ll install Andronix. Andronix (whose documentation you can find here) is an Android app that lets us install Linux distributions (Ubuntu, Debian, Manjaro, etc.) on an Android device without needing root. There are two types of distributions you can install: the normal distribution variant or the modified one (Modded OS). The first option is free, the second is paid, but you get an optimized distribution. You install it and start using it, unlike the first option where you might need to do some optimizations yourself. You can find Andronix pricing here.
As optimized versions we currently have the following distributions: Ubuntu, Debian, and Manjaro. The non-optimized versions are: Ubuntu, Debian, Kali, Manjaro, Fedora, Void, Alpine, and Arch.
Installing Linux on Android
Installing F-Droid
The F-Droid client is installed from the official page. You’ll need to allow installs from unknown sources.
Installing Termux
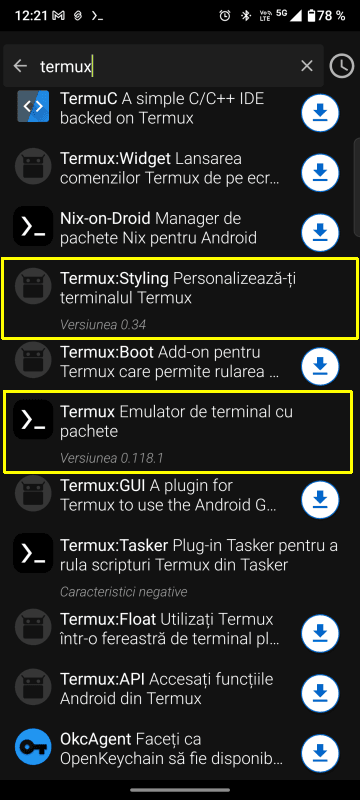
After you’ve installed F-Droid, open the app and search for termux. I also installed Termux Styling, but it’s not mandatory.
After installing Termux (and every time we use it) we go to notifications and tap Acquire wakelock. (See the update below)
Installing Andronix and the Linux distribution
We install Andronix from Google Play. After installing it, we’ll install the desired distribution. I use Ubuntu XFCE from Modded OS. Andronix will copy the command needed for installation to the Clipboard. We go into Termux, paste it, and run the command. Termux will download (watch out for data costs, make sure you’re on WiFi) and install the chosen distribution.
After it’s installed, we run the following command in Termux:
./start-andronix.sh
and we start configuring the chosen Linux distribution.
After configuring the Linux distribution, while we’re inside the distribution, not in Termux, we run the command
vncserver-start
to get access to the Linux graphical interface.
We’ll run these two commands (the first in Termux and the second in the distribution’s terminal) every time we want to work in Linux. Of course, the second one is only needed if we want to work through the graphical interface.
The VNC server in Linux is stopped with the command:
vncserver-stop
Installing a VNC client
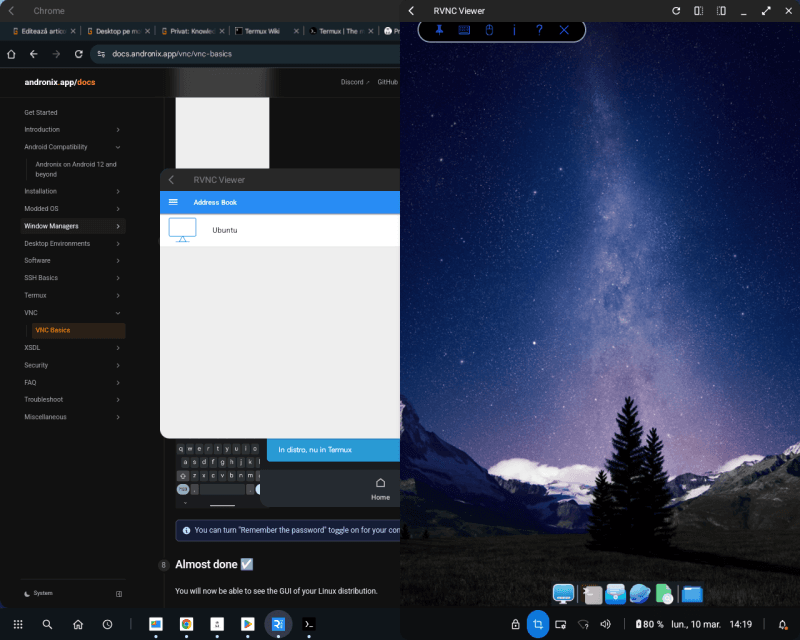
To access the Linux graphical interface, I use the RealVNC Viewer: Remote Desktop app from Google Play.
After installing the VNC client, we go to Address Book and tap + to add a computer. In Address we enter localhost:1 and in Name anything we want. Then we tap CONNECT, tap OK on the warning that it’s an insecure connection, enter the password we chose for the user when we configured Linux (NOT the Linux root password) and that’s it. We have Linux on mobile.
Steps required each time you use Linux on mobile
- Start Termux
- In notifications, enable Acquire wakelock
- In Termux run the command ./start-andronix.sh
- If we want a graphical interface:
- in the distribution terminal (that is, after we see user@localhost at the command line) run the command vncserver-start
- launch the VNC client
- connect to the Linux computer
- enter the Linux user password
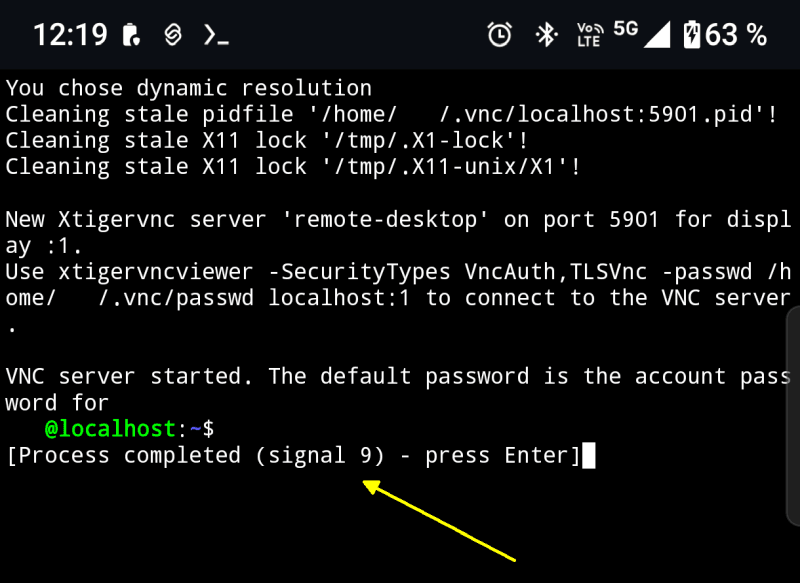
Update March 11, 2025
If, despite Acquire wakelock, you get this message in Termux
or this message in the VNC client
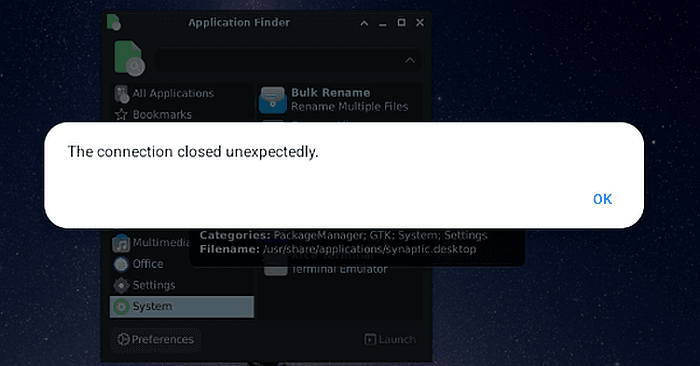
this means that Acquire wakelock didn’t do its job.
In this case, you’ll need to follow the instructions in the Andronix documentation: Andronix on Android 12 and beyond

Desktop on Mobile – Part 1
Let’s see what mobile desktop is and what it’s used for on a phone or tablet

Desktop on Mobile – Part 2
What mobile desktop solutions do phone and tablet manufacturers offer us?

Desktop on Mobile – Part 4
In the last article of the series, we draw some conclusions. Is a mobile desktop worth it or not?

Post fully edited on Smart Connect (Ready For) / Motorola Edge 50 Ultra